Roses Transplanting Step by Step: 2026 Complete Guide
Roses Transplanting Step by Step: 2026 Complete Guide
Transplanting roses can seem intimidating, but with the right knowledge, you can successfully move your beloved rose bushes to new locations in your garden. This roses transplanting step by step guide will walk you through the entire process, ensuring your roses thrive after the move. Whether you're redesigning your garden layout or your roses have outgrown their current spot, understanding the proper technique makes all the difference.
Why Learning Proper Rose Transplanting Matters
Transplanting roses requires precision and care because these plants develop extensive root systems that can span several feet underground. When done correctly, transplanting allows you to maintain healthy, flowering roses while improving your garden's overall design. Improper techniques, however, can shock the plant and result in stunted growth or even death. This step by step approach for beginners ensures your roses receive the best possible care during relocation.
Understanding why roses need transplanting helps you recognize when it's necessary. Mature roses may compete for nutrients, outgrow their space, or struggle with poor soil conditions in their current location. Moving them to a better spot can revitalize their health and productivity for years to come.
Best Time to Transplant Roses in 2026
The ideal time for transplanting roses is during their dormant season, typically late winter or early spring before new growth emerges. In most climates, this means transplanting in February or March when the ground is workable but not frozen. Fall transplanting can also work in warmer regions, giving roots time to establish before summer heat arrives.
Avoid transplanting during active growing seasons or extreme weather conditions. Summer heat stresses newly transplanted roses significantly, making survival challenging even for experienced gardeners. Choosing the right timing dramatically increases your success rate with this essential gardening skill.
Tools and Materials for Rose Transplanting
Before beginning the transplanting process, gather all necessary tools to ensure a smooth operation. Essential items include a sharp spade or shovel for digging, pruning shears for trimming, and a wheelbarrow for transport. You'll also need fresh potting soil, compost, bone meal, and a watering can or garden hose.
Additional materials that improve success rates include root hormone powder, burlap for wrapping roots, and mulch for protecting the newly planted rose. Having everything ready before you start prevents delays that could stress the plant during the vulnerable transplanting period.
Roses Transplanting Step by Step
Step 1: Prepare the New Location
Select a spot that receives at least six hours of direct sunlight daily and has well-draining soil. Dig a hole twice as wide as the rose's root ball and just as deep, loosening the surrounding soil to encourage root penetration. Amend the excavated soil with compost and bone meal to create a nutrient-rich planting environment.
Water the new planting hole thoroughly the day before transplanting to ensure adequate moisture. This preparation creates optimal conditions for your transplanted rose to establish quickly and begin producing new growth.
Step 2: Prepare the Rose Bush
Prune the rose bush heavily before transplanting, removing about one-third to one-half of its growth. Cut back all canes to 8-12 inches from the ground, focusing on removing dead, damaged, or crossing branches. This reduction balances the root system that will be lost during digging and reduces stress on the plant.
Water the rose thoroughly 24 hours before transplanting to ensure the plant and root ball are well-hydrated. A well-hydrated rose tolerates transplant shock better than one suffering from moisture stress.
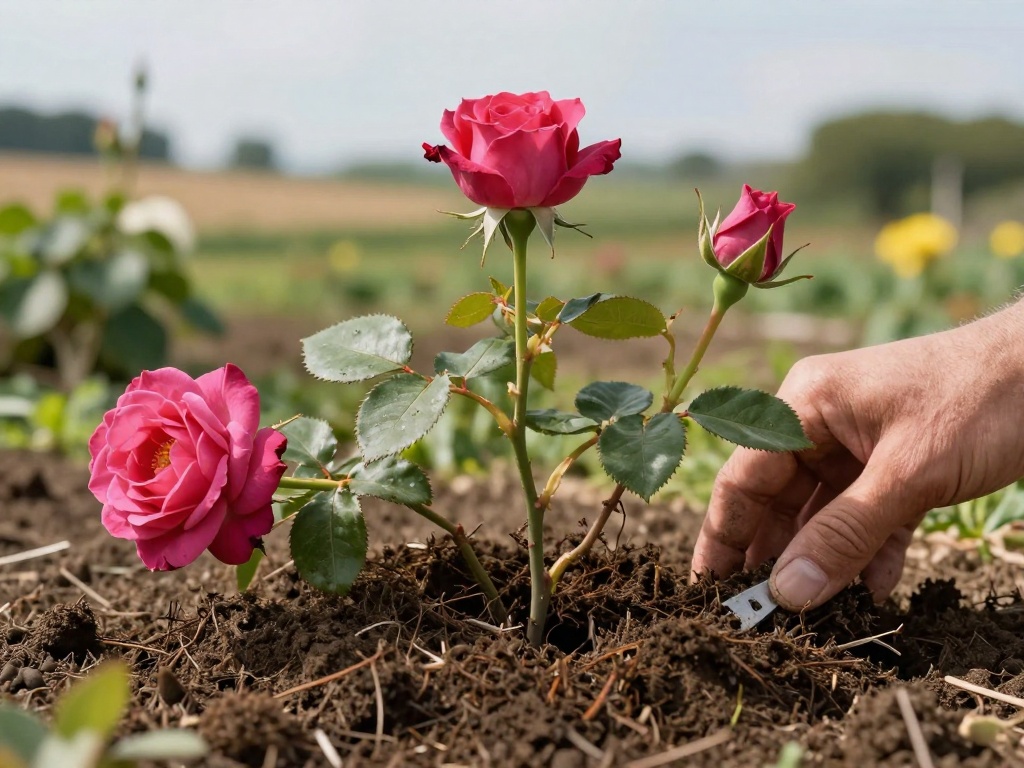
Step 3: Dig Around the Rose
Begin digging about 12-18 inches from the main stem, creating a circular trench around the plant. Work the shovel under the root ball at a 45-degree angle, loosening the soil gradually. For mature roses, you may need to excavate 12-15 inches deep to capture the majority of the root system.
Preserve as much of the root ball as possible, keeping the soil intact around the roots. Large roses may require two people to lift and transport safely. Use burlap to wrap and support the root ball during movement to prevent soil loss.
Step 4: Transport and Replant
Move the rose to its new location immediately, keeping the root ball covered and moist throughout transport. Place the rose in the center of the prepared hole, ensuring the graft union sits at or just below soil level. Backfill with the amended soil mixture, firming gently around the root ball to eliminate air pockets.
Create a watering basin around the base of the plant and water deeply to settle the soil thoroughly. Add more soil if settling occurs, and ensure the rose stands upright without leaning.
Step 5: Post-Transplant Care
Apply a 2-3 inch layer of organic mulch around the base of the transplanted rose, keeping it several inches away from the stem. Mulch retains moisture, regulates soil temperature, and suppresses weeds that compete for nutrients. Water deeply every few days for the first month, then transition to regular watering schedules.
Avoid fertilizing for at least six weeks after transplanting to allow roots to establish without stress. Once new growth appears, you can begin applying balanced rose fertilizer according to package directions for optimal results.
Common Transplanting Mistakes to Avoid
One of the biggest mistakes gardeners make is transplanting roses too shallowly, leaving the root ball exposed above soil level. Always ensure the hole is deep enough that the graft union sits properly, as this prevents disease and promotes healthy growth. Conversely, planting too deep can cause rot and hinder development.
Neglecting to water adequately after transplanting causes root stress and poor establishment. Monitor soil moisture consistently during the first growing season, adjusting your watering schedule based on rainfall and temperature conditions in your specific climate.
Signs Your Transplanted Rose is Thriving
After successful transplanting, expect to see new leaf growth within 4-6 weeks during the growing season. The leaves should appear healthy and green, without yellowing or spotting that might indicate transplant shock or nutrient deficiencies. Cane growth indicates the root system has successfully established itself in its new location.
Your transplanted rose should begin producing flower buds within the first season, though bloom quantity may be reduced compared to mature plants. With proper care, full blooming typically resumes by the second growing season after transplanting.
Frequently Asked Questions
Can I transplant a rose that's already budding?
While it's possible to transplant roses that are budding, it's not recommended for beginners. Budding roses are in active growth and experience greater transplant shock. Wait until the rose finishes blooming or transplant during dormancy for best results in 2026.
How long does it take for a transplanted rose to recover?
Most roses require 4-6 weeks to show signs of recovery after transplanting, with full establishment taking 1-2 growing seasons. Patience is essential—continue proper watering and care even if growth appears slow during the initial adjustment period.
Should I use root hormone when transplanting roses?
Root hormone can beneficial for transplanted roses, particularly for encouraging root development in stressed plants. Apply powdered root hormone to cut roots before replanting, following product instructions carefully for the best results in your rose garden.
What's the minimum size for a transplanted rose's root ball?
For healthy roses, maintain a root ball of at least 12 inches in diameter for small bushes and up to 18-24 inches for large, established plants. Larger root balls preserve more of the feeder roots that help the plant absorb water and nutrients after transplanting.
Can I transplant roses into containers?
Yes, roses can be successfully grown in containers using this step by step approach. Choose a pot at least 18 inches deep with drainage holes, use quality potting mix, and ensure adequate watering since containers dry out faster than ground soil.
How often should I water after transplanting?
Water newly transplanted roses every 2-3 days for the first month, adjusting based on weather conditions. In hot climates or containers, daily watering may be necessary. Reduce frequency gradually as the rose establishes, eventually transitioning to deep watering once weekly for ground-planted roses.
No comments