Roses Container Gardening Step by Step: 2026 Complete Guide
Roses Container Gardening Step by Step: 2026 Complete Guide
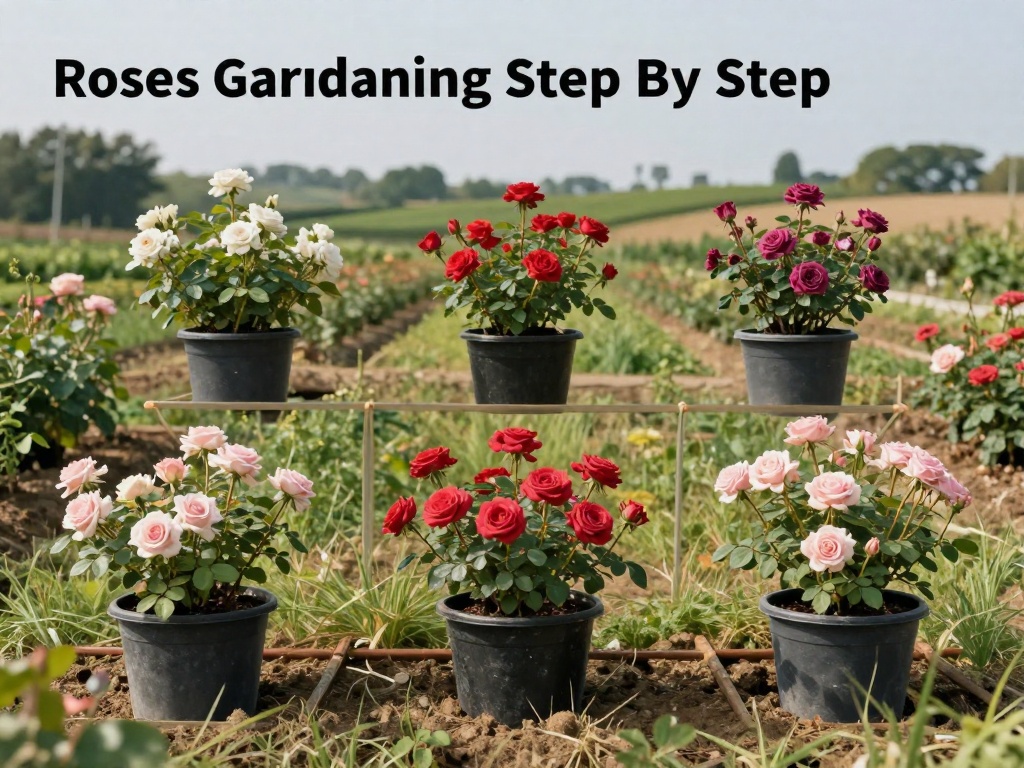
Container gardening with roses offers a beautiful solution for gardeners with limited space, apartment dwellers, or anyone wanting to add stunning blooms to patios, balconies, and decks. This comprehensive guide walks you through roses container gardening step by step, ensuring your potted roses thrive and bloom magnificently throughout the growing season.
Why Choose Container Gardening for Roses
Growing roses in containers provides remarkable flexibility that traditional garden planting cannot match. You can move your roses to optimize sunlight exposure, protect them from harsh weather, and bring fragrant blooms to any area of your outdoor living space.
Container roses also allow you to control soil conditions precisely, eliminating issues with poor garden soil. This makes roses container gardening step by step accessible even when native soil quality is unsuitable for these beloved flowering plants.
Benefits of Growing Roses in Containers
- Perfect for small spaces, balconies, and patios
- Mobile - relocate based on sunlight and weather needs
- Complete control over soil composition and drainage
- Avoid soil-borne diseases common in garden beds
- Easy winter protection and storage
- Create focal points throughout your outdoor areas
Choosing the Right Rose Variety for Containers
Not all roses adapt equally well to container life. Selecting appropriate varieties forms the foundation of successful roses container gardening step by step.
Best Rose Types for Containers
Miniature Roses represent the ideal choice for beginners, growing only 12-24 inches tall with compact root systems perfectly suited for smaller pots. These resilient varieties bloom profusely and tolerate container conditions remarkably well.
Patio Roses grow 18-36 inches tall and were specifically bred for container cultivation. They offer larger blooms than miniatures while maintaining manageable sizes suitable for pots.
Ground Cover Roses work excellently in hanging baskets and wide containers, cascading gracefully over pot edges with continuous blooming throughout the season.
Compact Floribunda Roses provide abundant clusters of blooms in a manageable size, making them popular choices for larger containers on patios and entryways.
Roses to Avoid in Containers
Large climbing roses, vigorous hybrid teas intended for cutting gardens, and sprawling shrub roses generally struggle in containers. Their extensive root systems and large mature sizes demand more soil volume than practical containers can provide.
Selecting the Perfect Container
Container selection significantly impacts your success with roses container gardening step by step. The right pot provides adequate root space, proper drainage, and aesthetic appeal.
Container Size Requirements
Miniature roses require containers at least 6-8 inches in diameter and depth. Patio and compact floribunda roses need pots measuring 15-18 inches in diameter. Always err toward larger containers, as roses prefer room for root development.
Material Considerations
Terracotta and Clay offer excellent breathability for roots but dry out quickly and may crack in cold climates. Plastic and Resin containers retain moisture longer and resist freezing damage. Wooden Planters provide natural insulation but eventually decay. Concrete and Stone offer permanence and stability but prove heavy and difficult to move.
Critical Drainage Requirements
Ensure your container has multiple drainage holes totaling at least one inch in diameter. Standing water quickly leads to root rot, the primary killer of container roses. Elevate containers slightly using pot feet or bricks to improve drainage further.
The Ideal Soil Mix for Container Roses
Commercial potting mixes rarely provide optimal conditions for roses. Creating your own blend following this step in roses container gardening step by step delivers superior results.
Recommended Soil Recipe
- Two parts high-quality peat moss or coco coir
- One part perlite for improved drainage and aeration
- One part well-aged compost for nutrients
- Half cup perlite or coarse sand for additional drainage
- Slow-release rose fertilizer mixed according to package directions
Never use garden soil alone in containers, as it compacts heavily, suffocating roots and preventing proper drainage. The loose, moisture-retentive yet well-draining mix described above promotes healthy root development.
Planting Your Container Roses Step by Step
Proper planting technique establishes your roses for success. Follow these steps carefully for optimal establishment.
Step 1: Prepare the Container
Clean previously used containers thoroughly with a 10% bleach solution to eliminate disease organisms. Rinse completely and allow drying. Place drainage materials like gravel or broken pottery over drainage holes to prevent clogging while maintaining water flow.
Step 2: Add Soil Layer
Fill the container with your prepared soil mix to approximately one-third capacity. For bare-root roses, create a small mound in the center. For potted roses, add soil until the top of the root ball sits approximately two inches below the container rim.
Step 3: Position the Rose
For bare-root roses, spread roots over the central mound, ensuring they point downward and outward. For container-grown roses, carefully remove the plant, gently loosening outer roots if they circle the root ball. Center the rose in the container.
Step 4: Fill and Settle
Add soil mix around the roots, firming gently to eliminate air pockets. Continue filling until the soil level reaches one inch below the container rim. Water thoroughly until moisture drains from the bottom, settling the soil completely.
Step 5: Initial Pruning and Care
Prune newly planted roses by removing any damaged or crossing canes. Apply a thin mulch layer of compost or bark chips to retain moisture and regulate soil temperature. Position the container in its permanent location with appropriate sunlight exposure.
Essential Care Requirements
Mastering ongoing care transforms good growth into spectacular displays. These essential practices complete your understanding of roses container gardening step by step.
Watering Guidelines
Container roses require more frequent watering than garden-planted specimens. Water deeply whenever the top inch of soil feels dry, typically every 2-3 days during warm weather. Reduce frequency during cool seasons and increase during hot summer months. Water at soil level, avoiding wetting foliage to prevent fungal diseases.
Fertilizing Schedule
Nutrients leach quickly from containers, requiring regular fertilization. Apply liquid fertilizer every two weeks during active growth, switching to a formula higher in phosphorus to promote blooming. Reduce feeding during dormant winter periods. Organic options like fish emulsion and seaweed extract provide excellent nutrition without salt buildup.
Sunlight Requirements
Most roses require 6-8 hours of direct sunlight daily for optimal blooming. Position containers where morning sun dries dew quickly, reducing disease pressure. Afternoon shade proves beneficial in extremely hot climates, preventing heat stress and excessive water loss.
Pruning and Maintenance
Regular pruning maintains shape, encourages blooming, and keeps plants healthy. This essential step in roses container gardening step by step prevents leggy growth and promotes abundant flowers.
When to Prune
Prune container roses in late winter or early spring when dormant buds begin swelling but before active growth commences. Remove dead, damaged, or diseased canes first, cutting to healthy wood. Shape remaining canes, making cuts at 45-degree angles approximately one-quarter inch above outward-facing buds.
Deadheading for Continuous Blooms
Remove spent blooms regularly to encourage continued flowering throughout the season. Cut just above the first five-leaflet leaf facing outward from the plant center. This redirects energy from seed production toward generating new blooms.
Overwintering Container Roses
Protecting roses from winter conditions presents unique challenges for container gardeners. Proper overwintering ensures your roses return vigorously the following spring.
Winter Protection Methods
In cold climates, move containers to an unheated garage or sheltered location where temperatures remain consistently between 25-40°F. Alternatively, bury containers in the ground and mulch heavily. Some gardeners wrap containers with burlap and insulation, placing them against building walls for radiant warmth.
Reduce watering significantly during winter dormancy but never allow soil to dry completely. Resume normal watering when spring growth resumes and containers thaw.
Common Problems and Solutions
Even with careful attention, container roses occasionally encounter issues. Recognizing and addressing problems early preserves plant health.
Pest Management
Aphids, spider mites, and thrips commonly affect container roses. Spray affected plants with strong water jets to dislodge pests, or apply insecticidal soap for persistent infestations. Encouraging beneficial insects like ladybugs provides natural pest control without harsh chemicals.
Disease Prevention
Black spot, powdery mildew, and rust appear most frequently on container roses. Prevent fungal diseases by ensuring adequate air circulation, watering at soil level, and removing affected leaves promptly. Copper fungicides treat established infections when applied according to label directions.
Nutrient Deficiencies
Yellowing leaves may indicate nitrogen deficiency, correctable with balanced fertilizer application. Poor blooming suggests insufficient phosphorus or excessive nitrogen. Iron chlorosis appears as yellow leaves with green veins, treatable with chelated iron applications.
FAQ: Frequently Asked Questions
What are the easiest roses to grow in containers for beginners?
Miniature roses and patio roses offer the easiest entry into roses container gardening step by step. These compact varieties tolerate container conditions exceptionally well, requiring less frequent watering and pruning than larger rose types. 'Rainbow Knock Out' and 'Petite Knock Out' series provide disease resistance and continuous blooms with minimal maintenance.
How often should I water roses in containers?
Container roses typically require watering every 2-3 days during active growing season, potentially daily during extreme heat. Check soil moisture by inserting your finger one inch deep; water when dry at that depth. Morning watering allows foliage to dry before evening, reducing fungal disease risk.
What is the best month to plant roses in containers?
Plant container-grown roses any time during the growing season, though spring and early fall provide ideal conditions in most climates. Spring planting allows establishment before summer heat, while fall planting enables root development before winter dormancy. Avoid planting during extreme heat or frozen conditions.
How much does roses container gardening cost compared to garden planting?
Initial costs for roses container gardening step by step include containers ($20-100), quality potting mix ($15-30), and rose plants ($15-50 each). Ongoing expenses involve fertilizer ($10-20 annually) and potential replacement plants. While initial investment exceeds bare garden planting, containers provide years of reuse and flexibility.
How long until container roses produce blooms?
Container roses typically bloom within 6-8 weeks of planting when planted from containers. Bare-root roses require one full growing season to establish before producing significant blooms. Established plants reward patience with increasingly abundant displays each successive year as root systems develop.
What common mistakes should beginners avoid?
Avoid choosing oversized containers initially, as excess soil retains moisture and causes root rot. Never use garden soil alone, as it compacts and drains poorly in containers. Prevent underwatering by establishing consistent monitoring routines. Finally, avoid placing containers in full shade, as roses require substantial sunlight for healthy growth and blooming.
No comments