Lavender Transplanting in Small Spaces: 2026 Complete Guide
Lavender Transplanting in Small Spaces: 2026 Complete Guide
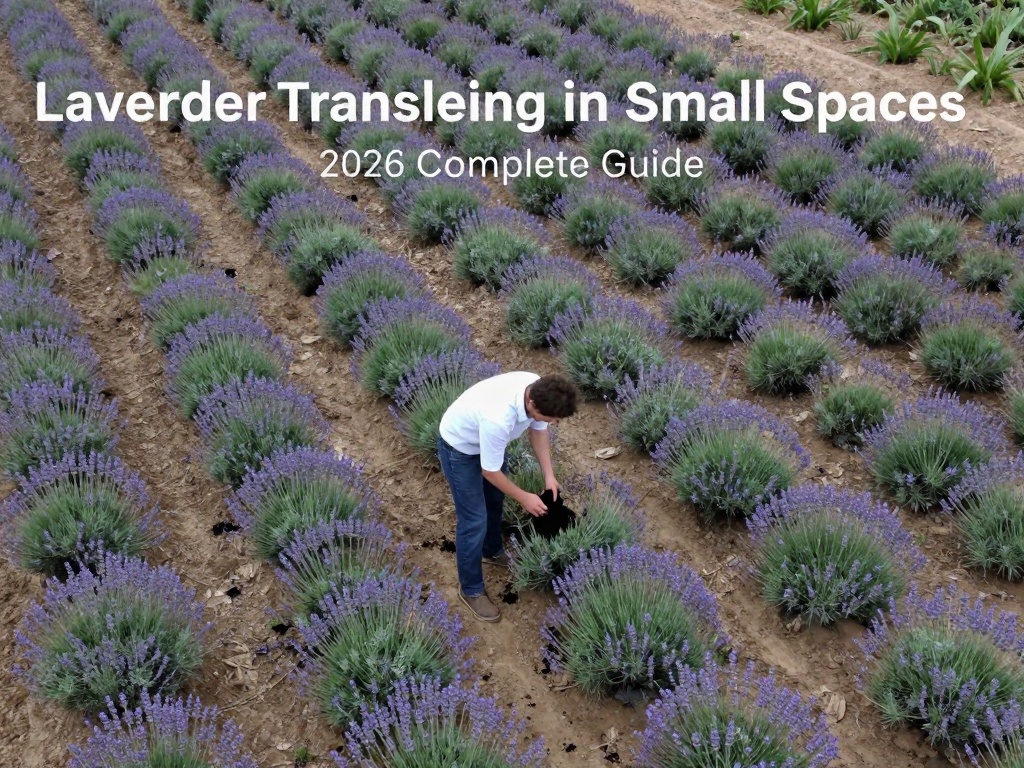
Transplanting lavender in small spaces doesn't have to feel like a puzzle. Whether you're working with a cramped balcony, a tiny patio, or just a few square feet of garden bed, this step-by-step guide will help you move your lavender successfully. With the right timing, technique, and container choices, your plants will thrive in even the most limited spaces.
Why Lavender Works Perfectly in Small Spaces
Lavender is one of the best herbs for compact gardening. This Mediterranean beauty loves poor, well-draining soil and actually prefers to be slightly root-bound. Unlike many plants that struggle in containers, lavender flourishes when its space is limited. The aromatic grey-green foliage and stunning purple blooms make it both practical and decorative in small areas.
Benefits of Growing Lavender in Tight Quarters
Small space lavender growing offers remarkable advantages. The plant's compact growth habit means you can fit multiple specimens on a windowsill or balcony railing. Its drought tolerance reduces watering demands, perfect for busy gardeners. Additionally, lavender's pest-repelling properties protect nearby plants naturally, making it an excellent companion in dense plantings.
When to Transplant Lavender for Best Results
Timing plays a crucial role in successful lavender transplanting. Spring offers the ideal window, typically four to six weeks before your last frost date. This gives roots time to establish before summer heat arrives. Early fall works in USDA zones 7 and warmer, allowing plants to settle before winter dormancy.
Signs Your Lavender Needs Transplanting
Watch for specific indicators that signal transplanting time. Roots emerging from drainage holes suggest the plant has outgrown its container. Yellowing leaves despite adequate sunlight often indicate root crowding. If the plant looks top-heavy or tips over easily, its root system likely needs more room to anchor properly.
Essential Tools and Materials
Gather these supplies before starting your transplanting project. You'll need a container with adequate drainage holes, ideally 2-3 inches larger than the current one. Quality potting mix matters significantly—choose a sandy, fast-draining blend designed for succulents or herbs. Gather gardening gloves, a trowel, and perlite or coarse sand for improving drainage.
Step-by-Step Lavender Transplanting Process
Step 1: Prepare the New Container
Select a pot that's slightly larger than your lavender's current home. Ensure it has drainage holes to prevent waterlogging. Add a layer of gravel or broken pottery at the bottom to promote proper water flow. Fill the container one-third full with your well-draining potting mix.
Step 2: Water the Plant Before Removal
Water your lavender thoroughly one to two days before transplanting. This moist soil helps the root ball hold together during the move. Avoid overwatering—soggy soil makes handling difficult and can stress the plant unnecessarily.
Step 3: Remove Lavender Carefully
Gently tip the container and slide the plant out, supporting the base of the stem. If the plant resists, tap the sides or run a knife along the edges to loosen. Never pull by the stems, as this causes serious damage that may kill the plant.
Step 4: Examine and Trim the Root Ball
Inspect the roots for signs of crowding or rot. Healthy lavender roots appear white or light tan. Trim any circling roots with clean, sharp scissors. This encourages new growth and prevents the plant from continuing its cramped pattern in the new container.
Step 5: Position and Backfill
Place your lavender at the same depth it grew previously—never bury the crown. Add potting mix around the root ball, pressing firmly but gently to eliminate air pockets. Leave about one inch between the soil surface and container rim for watering space.
Step 6: Initial Aftercare
Water lightly after transplanting, just enough to settle the soil. Move the container to a sheltered location for a few days, gradually reintroducing it to full sun. Avoid fertilizing for at least two weeks, allowing the plant to focus energy on root establishment.
Container Selection for Small Space Success
Choosing the right container impacts your lavender's health significantly. Terra cotta pots work exceptionally well because their porous walls allow soil to dry faster, mimicking lavender's natural Mediterranean environment. Ceramic and concrete containers offer aesthetic appeal and good insulation against temperature extremes.
Optimal Container Sizes
Match container size to your lavender variety for maximum success. Compact English lavender varieties thrive in 12-16 inch containers. Larger French or Spanish lavenders need at least 18 inches of width. Remember that deeper pots provide better insulation for roots in extreme climates.
Common Transplanting Mistakes to Avoid
Several errors can derail even experienced gardeners. Overpotting—using containers too large—retains excess moisture and causes root rot. Placing containers in areas with poor air circulation invites fungal disease. Finally, transplanting during summer heat stress puts enormous strain on plants already struggling with temperature extremes.
Caring for Transplanted Lavender in Small Spaces
Once established, lavender requires minimal maintenance appropriate for small space living. Position containers where they receive at least six hours of direct sunlight daily. Water only when the top inch of soil feels completely dry, typically once weekly during growing season. Reduce watering significantly during winter months.
Winter Protection Strategies
Small space gardeners face unique winter challenges. Move containers to sheltered locations against walls that absorb and radiate warmth. Wrap pots with burlap or bubble wrap to insulate roots from freezing temperatures. Elevate containers slightly to prevent drainage holes from sitting in ice.
Maximizing Small Spaces with Lavender
Think vertically when space is limited. Install window boxes along railings or window frames. Hang trailing lavender varieties in elevated planters. Group multiple lavender containers at varying heights to create visual interest while maximizing your growing area. Consider dwarf varieties specifically bred for compact growth.
Troubleshooting Post-Transplant Issues
Even careful gardeners encounter problems occasionally. Wilting despite adequate water often indicates root shock—patience usually resolves this within a week. Leggy growth suggests insufficient sunlight, requiring relocation to a brighter spot. Brown leaf tips may signal fertilizer burn if applied too early or too heavily.
Long-Term Success Strategies
Annual pruning maintains compact shape and encourages abundant flowering. Cut plants back by one-third in early spring, shaping them into a rounded mound. Every two to three years, root pruning during transplanting refreshes soil-bound specimens and extends their productive lifespan in containers.
FAQ
When is the best time to transplant lavender in containers?
The optimal transplanting window is spring, approximately four to six weeks before your last expected frost. This timing allows roots to establish during moderate temperatures before facing summer heat. Early fall transplanting works well in USDA zones 7 and warmer.
How do I know if my lavender needs a bigger pot?
Signs indicating your lavender requires a larger container include roots emerging from drainage holes, water running straight through without absorption, the plant tipping over easily, and slowed growth despite proper care. Generally, transplant when roots fill about 80% of the current container.
Can lavender survive winter in containers in small spaces?
Yes, with proper protection. Move containers to sheltered spots against walls, wrap pots with insulating material, and ensure excellent drainage to prevent root rot. In extremely cold climates, overwinter in an unheated garage or shed, watering sparingly once monthly.
What size container does lavender need for small balconies?
For balconies and tight spaces, a 12-inch container works well for compact English lavender varieties. This size provides adequate root space while fitting comfortably on standard balcony railings or corner positions. Ensure the pot has sufficient drainage holes.
How often should I water lavender after transplanting?
After transplanting, water every three to four days for the first two weeks. Once established, typically after three to four weeks, reduce watering to when the top inch of soil dries completely—usually once weekly in warm weather. Overwatering is the most common cause of lavender failure.
How long does lavender take to recover after transplanting?
Most lavender plants show signs of recovery within one to two weeks after transplanting. Complete establishment typically takes four to six weeks. During this recovery period, avoid fertilizing, minimize stress, and maintain consistent but careful watering practices.
No comments