Garlic Planting Easy Method: 2026 Complete Grower's Guide
Garlic Planting Easy Method: 2026 Complete Grower's Guide
Growing garlic doesn't have to be complicated. This garlic planting easy method breaks down everything you need to know to grow plump, aromatic bulbs right in your backyard. Whether you're working with a small container garden or a spacious raised bed, this step-by-step approach delivers impressive results year after year.
Garlic is one of the most rewarding crops for beginner gardeners. It's hardy, pest-resistant, and requires minimal maintenance once planted. In this guide, you'll discover exactly how to plant garlic using methods that work for any skill level.
Why Grow Garlic Using the Easy Method?
The garlic planting easy method simplifies traditional techniques without sacrificing harvest quality. This approach focuses on proper timing, soil preparation, and spacing—three factors that determine whether your garlic bulbs thrive or struggle.
Garlic planted correctly produces large cloves that store for months. You'll save money at the grocery store while enjoying superior flavor that store-bought varieties simply can't match. Plus, homegrown garlic contains higher concentrations of the beneficial compounds that make this bulb so nutritious.
Benefits of the Easy Method for Garlic
- Reduced planting time—complete the entire process in under 30 minutes
- Higher success rates for beginners and experienced gardeners alike
- Optimal spacing ensures maximum yield in limited spaces
- Minimal tools required—just a garden fork and your hands
When to Plant Garlic: Timing Matters
Timing determines your entire garlic growing season. The garlic planting easy method recommends fall planting for most regions, ideally 2-3 weeks before the ground freezes solid. This gives roots time to establish before winter dormancy.
In northern climates, plant between mid-September and late October. Southern gardeners should aim for October through November. Spring planting works for garlic grown as green garlic, though fall planting produces larger bulbs at harvest.
Understanding Your Climate Zone
Hardneck garlic varieties suit cold-weather regions (zones 3-7), while softneck varieties thrive in warmer areas (zones 8-10). The easy method adapts to both types—you simply adjust planting depth based on your local conditions.
Colder regions require deeper planting (3-4 inches) to protect cloves from frost heaving. Warmer climates can plant shallower (1-2 inches) since freeze damage isn't a concern.
Step-by-Step Garlic Planting Easy Method
Step 1: Choose Quality Seed Garlic
Success begins with exceptional planting stock. Purchase certified disease-free garlic bulbs from reputable nurseries or garden centers. Avoid grocery store garlic, which may be treated with growth inhibitors.
Look for large, firm cloves with intact papery skin. Larger cloves produce larger bulbs—this simple selection principle dramatically improves your harvest quality year after year.
Step 2: Prepare Your Planting Site
Garlic thrives in full sun locations receiving at least 6-8 hours of direct sunlight daily. The garlic planting easy method emphasizes soil quality above all else. Garlic needs well-draining soil rich in organic matter.
Work 2-4 inches of mature compost into the top 6-8 inches of soil. This improves drainage while adding nutrients. Sandy loam works best—if your soil is heavy clay, add coarse sand and compost to break it up.
Step 3: Separate and Select Cloves
Carefully break apart your garlic bulbs into individual cloves just before planting. Handle gently to avoid bruising. Keep the papery wrapper intact on each clove—these protective layers prevent rot and disease.
Sort your cloves by size, planting the largest ones separately. This organization ensures uniform germination and makes harvest timing more predictable.
Step 4: Plant Cloves at the Correct Depth
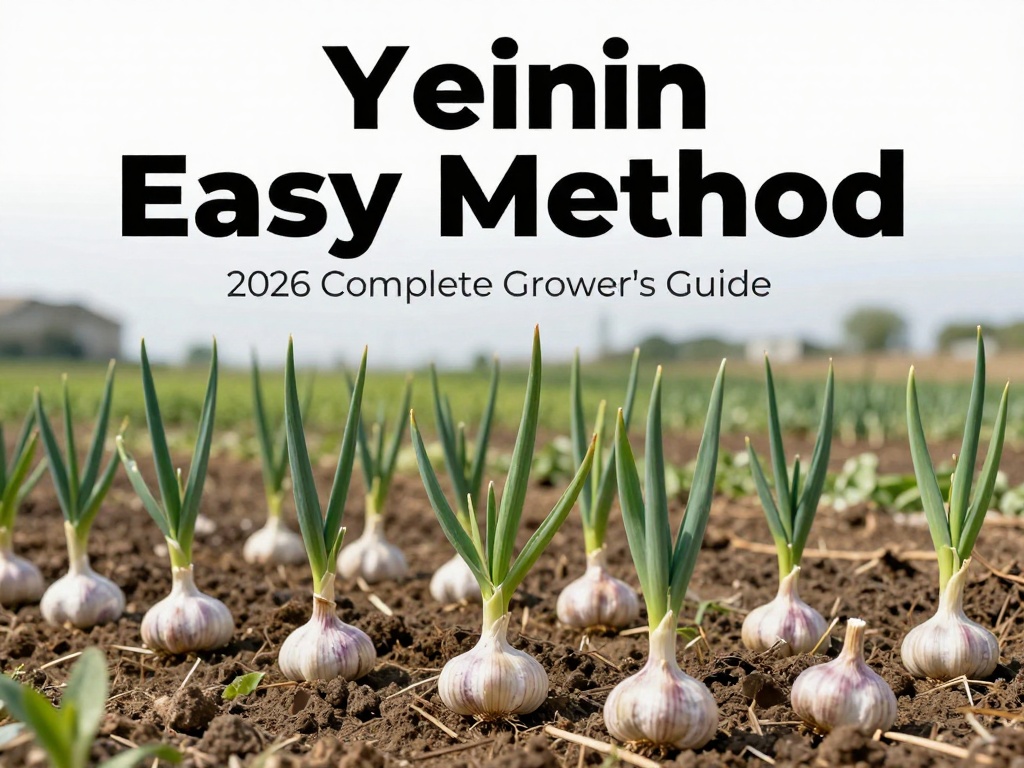
Using the garlic planting easy method, plant cloves pointy-end up, 2-4 inches deep. Space cloves 6-8 inches apart within rows, with rows 12-18 inches apart. This spacing provides adequate airflow while maximizing your growing area.
For container gardening, plant cloves 4 inches apart in pots at least 12 inches deep. Ensure containers have drainage holes—garlic absolutely cannot tolerate waterlogged conditions.
Step 5: Mulch for Winter Protection
Apply 4-6 inches of straw mulch immediately after planting. This protective layer insulates the soil, prevents frost heaving, suppresses weeds, and retains moisture. Remove mulch in early spring once new growth appears.
Mulching is perhaps the most critical step in the easy method—it essentially replaces the need for constant attention during winter months.
Garlic Care Through the Growing Season
Once spring arrives, your garlic plants will push through the soil quickly. The garlic planting easy method requires minimal intervention during this phase, making it perfect for busy gardeners.
Watering Guidelines
Garlic needs consistent moisture during bulb formation (April-June). Provide 1 inch of water weekly through rainfall or irrigation. Reduce watering as leaves begin yellowing in early summer—this signals maturity and signals the plant to finish bulb development.
Feeding Your Garlic
Apply a nitrogen-rich fertilizer in early spring when new growth emerges. Fish emulsion, blood meal, or composted manure work excellently. Stop fertilizing once the growing season reaches its midpoint—excess nitrogen late in development reduces storage quality.
Removing Scapes for Larger Bulbs
Hardneck garlic produces curly flowering stalks called scapes. Remove them when they curl but before they straighten—this redirects energy toward bulb growth rather than flower production. Scapes themselves are delicious grilled, sautéed, or added to pesto.
Harvesting and Curing Your Garlic
When lower leaves turn brown while upper leaves remain green, your garlic is ready for harvest—typically July through August depending on your region. The garlic planting easy method keeps harvest timing straightforward: watch for these visual cues.
Carefully loosen soil with a garden fork, then lift bulbs by hand. Avoid bruising—damaged garlic doesn't store well. Brush off excess soil without washing the bulbs.
The Curing Process
Hang garlic in bundles or spread on screens in a dry, well-ventilated area away from direct sunlight. Cure for 2-3 weeks until outer skins become papery and necks feel tight. Properly cured garlic stores for 6-8 months at room temperature.
Trim roots and cut stalks to 1 inch above the bulb after curing. Store in mesh bags or woven baskets in cool (32-40°F), dry locations.
Common Mistakes to Avoid
Even with the garlic planting easy method, certain errors can compromise your harvest. Avoid these pitfalls for guaranteed success:
- Planting too shallow—shallow cloves heave out during freeze-thaw cycles
- Overwatering—saturated soil causes rot and fungal problems
- Harvesting too early—immature bulbs are small with incomplete wrappers
- Skipping mulch—without insulation, clove survival rates drop significantly
- Using poor-quality seed stock—weak cloves produce weak plants
Storing Your Garlic Harvest
Proper storage preserves your hard work for months. The garlic planting easy method stores bulbs successfully in any dry location with good air circulation. Avoid refrigerators—cold temperatures trigger sprouting and alter flavor.
Check stored garlic monthly for any soft or moldy bulbs. Remove affected cloves immediately to prevent spread. Well-stored garlic should remain firm and flavorful well into winter.
Frequently Asked Questions
What is the easiest method for planting garlic?
The easiest method involves planting individual cloves in fall, 2-4 inches deep, spaced 6-8 inches apart. Mulch heavily with straw, then simply wait for spring growth. This approach requires minimal maintenance while producing excellent results.
Can I plant garlic in containers using this method?
Absolutely. Use containers at least 12 inches deep with good drainage holes. Plant cloves 4 inches apart in quality potting mix enriched with compost. Container garlic requires slightly more frequent watering than garden-planted garlic.
How long does garlic take to grow using this easy method?
Garlic typically takes 8-9 months from planting to harvest. Fall-planted garlic grows roots through winter, produces leaves in spring, and bulbs mature by mid-summer. The easy method doesn't speed this timeline—it simply makes each stage easier to manage.
Is the fall planting method better than spring planting?
Fall planting produces larger bulbs because cloves experience a cold period (vernalization) that triggers bulb development. Spring planting results in smaller garlic, though it still works if you miss fall planting windows. The easy method recommends fall planting for maximum yields.
How much does it cost to grow garlic using this method?
Initial costs are minimal: a single garlic bulb costs $0.50-$2 and contains 8-12 planting cloves. Beyond seed garlic, you'll need compost ($0-10 depending on source), straw mulch (often free), and optional fertilizer. Most gardeners spend under $20 for their first substantial harvest.
What are the most common beginner mistakes with garlic?
Planting too early in fall causes excessive top growth before winter. Planting too late means inadequate root establishment. Overwatering causes yellowing and rot. Harvesting too late splits bulbs and reduced storage life. Skipping mulch invites winter losses. The easy method addresses all these issues.
No comments