Spinach Seed Starting on Balcony: 2026 Grower's Guide
Spinach Seed Starting on Balcony: 2026 Grower's Guide
Starting spinach seeds on your balcony offers a rewarding way to enjoy fresh, nutritious greens even in limited urban spaces. This step by step guide walks you through everything you need for successful balcony spinach cultivation in containers, from seed selection to your first harvest.
Why Grow Spinach on Your Balcony?
Spinach seed starting on balcony has become increasingly popular among urban gardeners seeking fresh produce. This cool-weather crop thrives in containers and requires minimal space while delivering maximum nutrition. Baby spinach leaves are packed with iron, vitamins A and C, and antioxidants that rival store-bought options.
Container gardening allows you to control growing conditions, avoid pesticides, and enjoy harvests just steps from your kitchen. Even beginners with no prior gardening experience can achieve impressive results with the right techniques and timing.
Choosing the Right Spinach Seeds for Balcony Growing
Not all spinach varieties perform equally well in container environments. Select seeds specifically suited for small-space gardening and rapid growth. Long-tail keyword variations like "fast-growing spinach varieties for containers" help identify ideal choices.
Best Spinach Varieties for Balcony Containers
- Smooth-leaf varieties: Bloomsdale and Space deliver tender leaves perfect for salads
- Semi-savoy types: Tyee and Winter Bloomsdale offer good disease resistance
- Baby leaf varieties: Little Hero and Baby's Leaf develop quickly in restricted root spaces
Purchase fresh seeds from reputable suppliers to ensure high germination rates. Check package dates and store unused seeds in cool, dry conditions for future plantings.
When to Start Spinach Seeds on Your Balcony
Timing plays a crucial role in spinach seed starting success. This cool-season crop prefers temperatures between 50-70°F (10-21°C) for optimal germination and growth. Understanding seasonal windows prevents common beginner mistakes.
Spring Planting Schedule
For spring harvests, begin spinach seed starting 4-6 weeks before your last expected frost date. In most climates, this means late February through March for container planting on protected balconies. The natural light increase supports healthy seedling development.
Fall Planting Schedule
Fall cultivation often produces superior results because spinach bolts less quickly in cooling temperatures. Start seeds indoors 6-8 weeks before first fall frost, then move containers outside once temperatures moderate. This approach works exceptionally well in USDA zones 7-9.
Essential Supplies for Starting Spinach Seeds
Prepare your materials before beginning the seed starting process. Having everything ready ensures smooth operation and reduces stress on emerging seedlings.
- Quality seed-starting mix orDIY blend of peat moss, vermiculite, and perlite
- Containers with drainage holes (4-6 inches deep for individual plants)
- Watering tray or drip saucers to catch excess moisture
- Clear plastic dome or plastic wrap for humidity retention during germination
- Labels and markers for tracking multiple varieties
Step by Step Spinach Seed Starting Process
Step 1: Preparing Your Containers
Clean previously used containers with a 10% bleach solution to eliminate disease pathogens. Ensure adequate drainage by adding gravel or broken pottery pieces to the bottom before filling with moistened seed-starting mix. Leave one inch of space below the container rim.
Step 2: Planting the Seeds
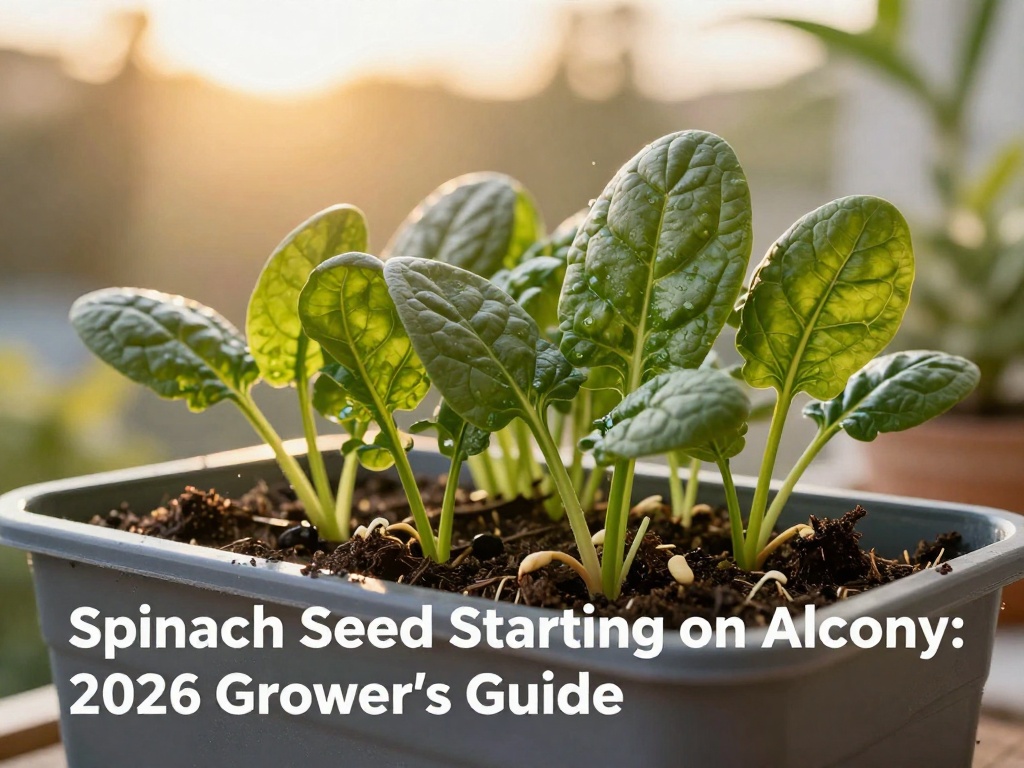
Sow spinach seeds at a depth of 1/2 inch, spacing them approximately 2 inches apart. Lightly cover with soil and press down gently to ensure good seed-to-soil contact. Moisten the surface with a fine mist spray to avoid displacing seeds.
For continuous harvests in small spaces, consider succession planting every 2-3 weeks rather than planting all seeds simultaneously. This technique extends your productive window significantly.
Step 3: Creating Optimal Germination Conditions
Spinach seeds germinate best in darkness at temperatures between 55-70°F. Cover containers with plastic domes or wrap to maintain humidity, and place them in a warm location away from direct sunlight initially. Check daily for moisture levels and germination progress.
Expected germination time ranges from 7-14 days depending on variety and temperature conditions. Cooler temperatures slow germination but often produce more vigorous seedlings.
Step 4: Moving Seedlings to Light
Once sprouts emerge, remove coverings immediately and move containers to your sunniest balcony location. Seedlings require 4-6 hours of direct sunlight daily for compact, healthy growth. Rotate containers regularly to prevent leaning toward light sources.
Caring for Balcony Spinach Seedlings
Watering Requirements
Consistent moisture proves essential during early growth stages. Water when the top inch of soil feels dry, typically every 2-3 days depending on weather conditions. Avoid overwatering, which promotes fungal diseases and root rot in container spinach.
Thinning Seedlings
Once seedlings develop their second set of true leaves, thin them to 4-6 inches apart. Use scissors to snip weaker plants at soil level rather than pulling, which disturbs neighboring root systems. Thinned seedlings can be transplanted to other containers or added to salads.
Feeding Young Plants
Begin light fertilizing two weeks after germination using a balanced, water-soluble fertilizer diluted to half strength. Organic options like fish emulsion or compost tea work well for those preferring natural approaches. Avoid over-fertilizing, which produces lush foliage with reduced flavor intensity.
Transplanting and Final Container Placement
For balcony settings, spinach typically grows best in containers at least 8 inches deep. Window boxes, raised planters, and large pots all accommodate healthy root development. Position containers where they receive morning sun and afternoon shade in hotter climates.
Consider using a north-facing balcony if available, as spinach tolerates shade better than intense summer heat. Reflective surfaces can boost light availability in limited-sun locations.
Harvesting Your Balcony Spinach
Baby spinach leaves reach harvestable size in 25-40 days from seed starting. Harvest outer leaves first, allowing inner leaves to continue developing for extended production. The cut-and-come-again method maximizes yield from limited container space.
Pick leaves in the morning when water content is highest for optimal crispness. Rinse thoroughly and store in refrigerator crisper drawers for up to one week. Fresh spinach tastes noticeably superior to store-bought alternatives.
Troubleshooting Common Balcony Spinach Problems
Even with careful attention, issues occasionally arise during spinach seed starting and cultivation. Recognizing problems early enables quick intervention.
- Leggy seedlings: Insufficient light causes weak, stretched growth. Relocate to brighter position or supplement with grow lights
- Yellowing leaves: Often indicates overwatering or nutrient deficiency. Adjust watering schedule and consider fertilizing
- Bolt running: Heat stress triggers premature flowering. Plant earlier in cool seasons and provide afternoon shade
- Pest issues: Aphids and leaf miners occasionally affect balcony spinach. Remove manually or use organic insecticidal soap
Tips for Maximum Yield in Container Growing
Optimize your balcony spinach production by implementing advanced techniques designed for limited-space environments. Vertical gardening solutions, such as stacking planters or rail-mounted containers, multiply available growing area significantly.
Mulching container surfaces helps retain soil moisture and regulates temperature fluctuations that stress plant roots. Organic mulches like straw or shredded leaves also add nutrients as they decompose.
Companion planting with herbs like cilantro or chives can repel pests naturally while maximizing your container diversity. Just ensure all plants share similar water and light requirements.
Frequently Asked Questions
What is the best month to start spinach seeds on a balcony?
Early spring (March-April) and fall (September-October) provide ideal conditions. Spinach thrives in temperatures between 50-70°F, making these transition seasons perfect for balcony cultivation in most growing zones.
How deep should spinach seeds be planted in containers?
Plant spinach seeds at 1/2 inch depth in container soil. This depth provides adequate darkness for germination while remaining close enough to the surface for easy seedling emergence.
Can I start spinach seeds directly in balcony containers?
Yes, direct sowing works well for balcony spinach. Simply follow the step by step seed starting process outlined above, ensuring containers have proper drainage and quality potting mix.
How long does spinach take to grow from seed on a balcony?
Baby spinach leaves are ready for harvest in 25-40 days from seed starting. Full-size leaves require 40-50 days. Cooler temperatures extend timelines slightly but improve leaf quality and flavor.
What is the biggest mistake beginners make growing spinach in containers?
Starting seeds too late in spring when temperatures warm quickly causes spinach to bolt before maturing. Plant early enough to complete the growth cycle before summer heat arrives, or focus on fall cultivation instead.
Do spinach seeds need light to germinate?
No, spinach seeds germinate best in darkness. Cover seeded containers with plastic domes and place in a warm, dark location until sprouts appear, then immediately move to bright light.
How much sunlight does spinach need in containers?
Spinach requires 4-6 hours of direct sunlight daily for optimal growth. Morning sun with afternoon shade works excellently, especially in warmer climates where afternoon heat stresses cool-weather crops.
No comments