Drip Irrigation Setup for Raised Bed Gardens: 2024 Step-by-Step Guide
Drip Irrigation Setup for Raised Bed Gardens: 2024 Step-by-Step Guide
A drip irrigation setup for raised bed gardens delivers water directly to plant root zones, cutting water waste by up to 70% compared to traditional sprinklers, per 2024 USDA agricultural data. This system eliminates overwatering, reduces weed growth, and frees up gardeners’ time that would otherwise be spent hand-watering. It’s ideal for small-scale and home gardeners growing vegetables, herbs, or flowers in raised bed layouts.
What Supplies Do You Need for Your Drip Irrigation Setup?
Core System Components
All components are widely available at garden centers or online retailers, and most pre-assembled or custom kits cost between $50 and $150 for a standard 4-bed raised garden layout, per 2024 Home Depot garden supply pricing. You can also source individual parts to customize your system for unique bed sizes.
- Standard outdoor faucet adapter to connect your system to a home water line
- Pressure regulator to keep water flow between 10-25 PSI, the ideal range for drip systems
- Sediment filter to prevent clogs from debris in tap or well water
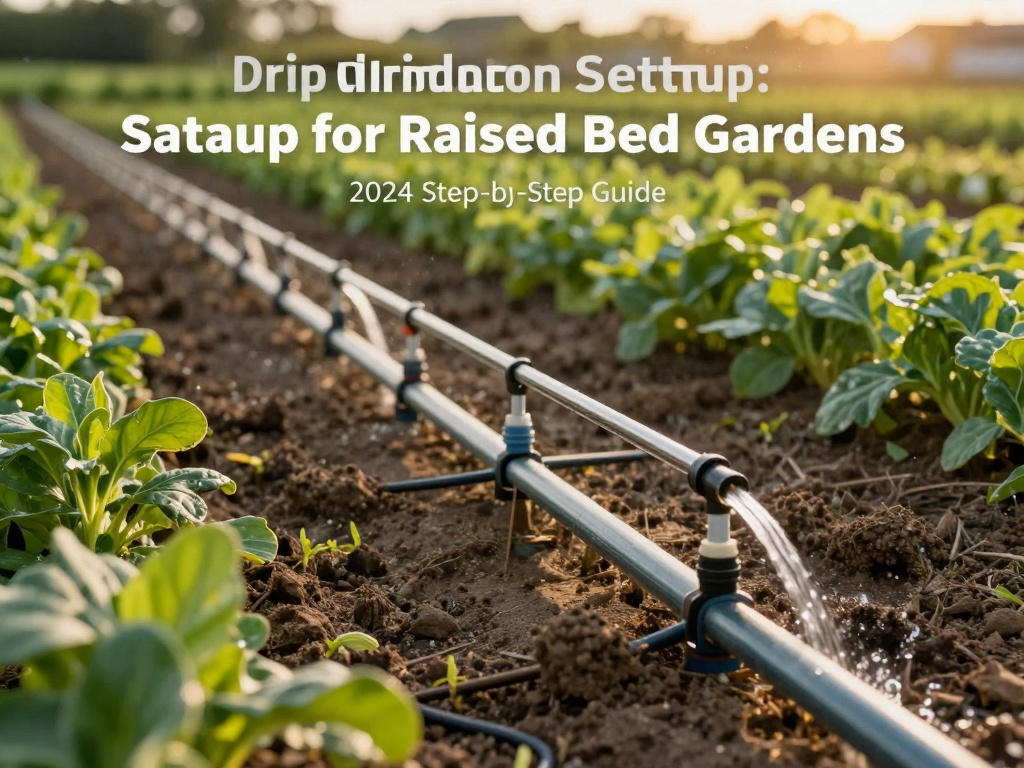
- 1/2-inch main tubing to run along the length of your raised bed rows
- 1/4-inch feeder tubing to connect individual emitters to the main line
- 1-gallon-per-hour (GPH) emitters, spaced 12 inches apart for most vegetable crops
- Plastic stakes to secure tubing to soil or raised bed wooden frames
Step-by-Step Installation Process
1. Prep Your Water Source and Lay Main Tubing
Start by connecting the adapter, pressure regulator, and filter to your outdoor faucet in that exact order. This sequence protects your drip system from damage caused by high water pressure or sediment buildup. Roll out your 1/2-inch main tubing along the top edge of each raised bed, leaving 2 feet of slack at the faucet end to avoid tension that can pull connections loose.
2. Install Emitters and Feeder Lines
Measure the spacing of your plants to place emitters directly above each root zone. For standard 4x8 foot raised beds, you can run a single main line down the center of the bed, with feeder tubes branching out to each plant. Punch a small hole in the main tubing with a purpose-made hole punch tool, then push the 1/4-inch feeder tube into the hole and attach an emitter to the free end.
Secure all tubing to the bed frame or soil surface with plastic stakes to prevent shifting from wind, foot traffic, or soil expansion. This also keeps emitters aligned with root zones as plants grow throughout the season.
3. Test and Seal the System
Once all emitters are in place, cap the end of each main tubing line to prevent water leakage. Turn on the faucet and walk through each bed to check for weak flow, clogs, or leaks. Replace any clogged emitters and seal small leaks with tubing repair tape if needed. This test run ensures every plant receives consistent water before you add an automated timer to your system.
Key Benefits of Drip Irrigation for Raised Beds
Raised beds drain 2-3 times faster than in-ground garden plots, so the targeted watering of a drip system solves two common raised bed problems: underwatering in hot weather and root rot from overwatering. The USDA reports that drip irrigation reduces overall garden water use by 50-70% compared to overhead sprinklers, which lose significant water to evaporation and runoff. This system also reduces weed growth by only watering plant root zones, rather than the entire soil surface where weed seeds germinate.
Frequently Asked Questions
How long should I run my drip irrigation system each day?
For most vegetable crops in raised beds, run the system for 30-45 minutes once or twice a week, adjusting for local rainfall and temperature. Hot, dry summer weather may require an extra 15 minutes per watering session to keep root zones consistently moist.
Can I automate my drip irrigation setup?
Yes, adding a programmable outdoor timer to your faucet lets you set consistent watering schedules without manual input. Smart timers, which connect to local weather apps to adjust watering based on rainfall, can reduce water waste even further for most home gardeners.
How do I maintain my drip system to prevent long-term clogs?
Flush your main tubing at the end of each growing season to clear any built-up sediment. Replace the system’s filter every 6 months, and inspect emitters monthly during the growing season to clear small clogs with a pin if they occur. Winterize above-ground tubing by draining all water and storing it indoors to prevent cracking in freezing temperatures.
No comments