Herb Garden Drip Irrigation System: 2026 Complete Setup Guide
Herb Garden Drip Irrigation System: 2026 Complete Setup Guide
Growing herbs at home is incredibly rewarding, but consistent watering can become a time-consuming chore. A well-designed herb garden irrigation drip system solves this problem by delivering water directly to plant roots while you focus on harvesting fresh basil, rosemary, and thyme. This guide covers everything you need to know about installing and maintaining an efficient drip irrigation setup for your herb garden in 2026.
What is a Drip Irrigation System for Herb Gardens?
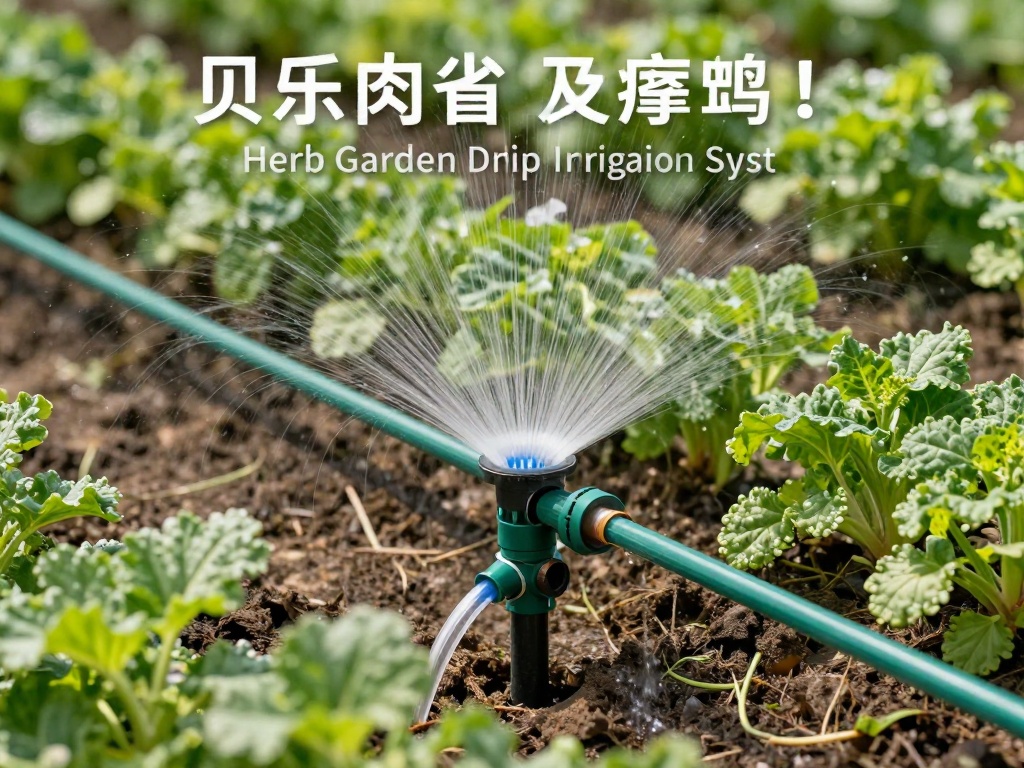
A drip irrigation system delivers water slowly and directly to the soil around plant roots through a network of tubing, emitters, and connectors. Unlike traditional overhead sprinklers, this method minimizes water waste through evaporation and runoff. For herb gardens, this targeted approach ensures each plant receives exactly the moisture it needs without wetting foliage, which can lead to fungal diseases.
The basic setup includes a water source connected to main supply lines that branch into smaller tubes positioned near each herb plant. Emitters or drippers release water at controlled rates, typically 0.5 to 2 gallons per hour. Timers can automate the process, giving you a truly hands-off approach to garden maintenance.
Benefits of Drip Irrigation for Your Herb Garden
Water Efficiency
Drip systems can reduce water usage by 30 to 50 percent compared to conventional watering methods. Water goes directly to the root zone where plants actually use it, eliminating waste from evaporation and overspray. This efficiency proves especially valuable during summer months when herbs demand consistent moisture.
Healthier Plants and Better Growth
Herbs like basil, cilantro, and parsley thrive with consistent, moderate moisture levels. Overwatering or underwatering stresses plants and degrades essential oil content—the compounds that give herbs their flavor and aroma. A drip system maintains optimal soil moisture, promoting vigorous growth and more flavorful harvests.
Time Savings and Convenience
Once installed, an automated herb garden irrigation drip system waters your plants on schedule without any intervention. This proves invaluable during vacations, busy workweeks, or extreme heat waves when daily watering becomes essential. You'll reclaim hours previously spent hauling hoses and standing in the garden.
Components Needed for Your Drip System
Building a basic herb garden drip irrigation setup requires several key components available at any garden center or hardware store. Understanding each part helps you plan an effective system for your specific garden layout.
- Timer or Controller: Automates watering schedules with customizable run times and frequencies
- Backflow Preventer: Protects your home water supply from contamination
- Pressure Regulator: Reduces household water pressure to safe levels for drip tubing (typically 25-30 PSI)
- Filter: Removes sediment and debris that could clog emitters
- Main Supply Tubing: 1/2-inch black polyethylene tubing forms the backbone of your system
- Micro Tubing: 1/4-inch tubing connects main lines to individual emitters
- Drip Emitters: 0.5 to 2 GPH emitters release water at the plant base
- Stakes and Holddowns: Secure tubing in place throughout the garden
- Barbed Fittings and Connectors: Join tubing sections and create branch lines
- Hole Punch: Creates openings in main tubing for emitter connections
How to Install a Drip System in Your Herb Garden: Step by Step
Planning Your Layout
Before purchasing materials, sketch your herb garden layout on paper. Note each plant's location and group herbs with similar water requirements together. Mediterranean herbs like rosemary, thyme, and oregano prefer drier conditions and may need fewer emitters, while basil and parsley require more consistent moisture.
Measure your garden dimensions and calculate total tubing needed. For container gardens, plan separate micro-tubing runs to each pot. Mark the water source location and determine whether you'll use a hose bib connection or dedicated line.
Installing the Main Line
Connect your timer to the faucet, followed by the backflow preventer, pressure regulator, and filter in sequence. Attach the main 1/2-inch supply tubing and run it along the highest edge of your garden to ensure even water distribution. Use stakes to secure the tubing every 3 to 4 feet, especially around curves.
For raised bed herb gardens, run the main line along the bed's edge with a single branch line entering the planting area. This configuration keeps tubing accessible for adjustments while maintaining a clean appearance.
Setting Up Drippers and Emitters
Use a hole punch to create openings in the main tubing at each plant location. Insert barbed connectors or punch-in emitters directly into these holes. For individual pots in container gardens, run 1/4-inch micro-tubing from the main line to each container, securing emitters near the soil surface.
Install 1 to 2 GPH emitters for larger herbs like rosemary and sage, and use lower-flow 0.5 GPH emitters for smaller plants and those in smaller containers. Consider adding adjustable emitters for flexibility—you can fine-tune water output as your herbs grow.
Testing Your System
Before covering trenches or adding mulch, run the system for a full cycle and observe performance. Check that all emitters function properly and no leaks exist at connection points. Watch for pooling or dry spots and adjust emitter placement accordingly. Test your timer settings and verify the system runs on your intended schedule.
Best Practices for Herb Garden Drip Irrigation in 2026
Successful drip irrigation requires ongoing attention and seasonal adjustments. Implement these proven practices to maximize your system's effectiveness and extend its lifespan.
Run your herb garden irrigation drip system early morning, ideally between 5 and 9 AM. This allows foliage to dry quickly, reducing disease risk, and water infiltrates soil before evaporation rates climb. Most herbs need 1 to 2 inches of water weekly, but adjust based on rainfall, temperature, and specific plant requirements.
Inspect emitters monthly for clogs and clean filters regularly. Flush the main lines seasonally to remove sediment buildup. During winter in cold climates, drain the system completely or remove it before freezing temperatures arrive. UV-resistant tubing typically lasts 5 to 7 years, while standard tubing may degrade faster in sunny locations.
Common Mistakes to Avoid
New gardeners often make predictable errors when installing their first drip system. Avoiding these pitfalls ensures your investment performs optimally for years to come.
Never skip the pressure regulator. Household water pressure exceeds what drip emitters can handle, causing blowouts, leaks, and inconsistent watering. Similarly, installing emitters without filters guarantees eventual clogging from sediment and mineral deposits.
Avoid placing emitters too far from plant stems. Water must reach the active root zone, which typically extends outward from the stem in a radius matching the plant's canopy. Position emitters 2 to 4 inches from herb stems for established plants and closer for seedlings.
FAQ: Herb Garden Drip Irrigation System
How much does it cost to install a drip irrigation system for a small herb garden?
A basic DIY drip system for a small herb garden typically costs between $50 and $150 depending on garden size and component quality. Premium smart timers and pressure-regulating kits fall at the higher end. This investment pays for itself within one to two growing seasons through water savings.
Can I use a drip irrigation system for herbs in containers?
Absolutely. Container herb gardens benefit tremendously from drip systems. Run individual micro-tubing to each pot and use adjustable emitters calibrated to container size. Self-watering containers with reservoir systems also work well when connected to your drip setup.
How often should I run my herb garden irrigation drip system?
Most herb gardens need drip irrigation every 1 to 3 days during warm weather, with frequency adjusting based on temperature, humidity, and rainfall. Use a moisture meter or observe plant indicators like wilting or yellowing leaves to fine-tune your schedule. Automatic timers simplify this process significantly.
What is the best timer for an automated herb garden drip system?
Digital battery-powered timers offer reliable performance for most home gardens and cost $20 to $50. WiFi-enabled smart timers provide app control and weather-based adjustments, making them ideal for 2026 gardens where convenience matters. Look for models with multiple programs and manual override options.
Will drip irrigation work for all types of herbs?
Drip systems accommodate virtually all culinary herbs, but you should group plants by water needs. Keep rosemary, thyme, oregano, and sage on separate zones with lower water output. Position basil, cilantro, parsley, and mint together for more frequent watering. This zoning approach ensures optimal conditions for each herb type.
How long does it take to install a drip system in an existing herb garden?
Installing a complete herb garden irrigation drip system typically requires 2 to 4 hours for a medium-sized garden with 15 to 25 plants. Planning and material gathering take additional time beforehand. Once installed, annual maintenance requires only 30 minutes for winterization and spring startup procedures.
No comments