Vermicomposting Worm Bin Setup: 2026 Guide for Beginners
Vermicomposting Worm Bin Setup: 2026 Guide for Beginners
Vermicomposting worm bin setup is one of the most rewarding methods for converting kitchen scraps into nutrient-rich fertilizer for your garden. Unlike traditional composting, vermicomposting uses red wiggler worms to break down organic matter quickly and efficiently, producing castings that supercharge plant growth. Whether you live in an apartment or have a sprawling backyard, setting up a worm bin can transform your waste into garden gold.
This comprehensive guide walks you through every step of creating your own vermicomposting system in 2026. You'll discover exactly what materials you need, how to maintain the perfect environment for your worms, and when to harvest your finished compost. Let's dive in and get your worm bin thriving!
What Is Vermicomposting and Why Start Now?
Vermicomposting is the process of using specific earthworm species, primarily red wigglers (Eisenia fetida), to decompose organic waste. These remarkable creatures consume their weight in food daily, producing vermicompost packed with beneficial microorganisms, enzymes, and nutrients plants crave. The result is a dark, crumbly, soil-like material that improves soil structure, water retention, and plant health.
Starting your vermicomposting journey in 2026 comes with excellent resources and community support. More gardeners than ever are embracing this sustainable practice, reducing landfill waste while creating free, high-quality fertilizer for their plants. The process requires minimal space, produces no unpleasant odors when managed correctly, and can operate year-round indoors or outdoors.
Choosing the Right Worm Bin for Your Space
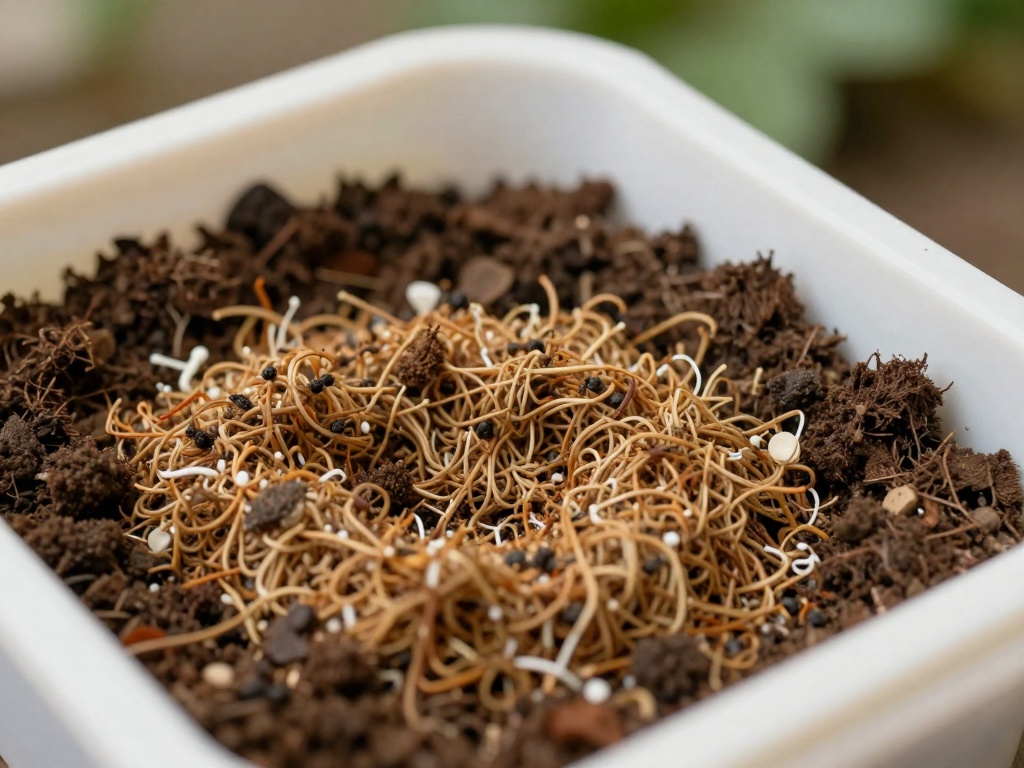
Selecting an appropriate container is your first critical decision in vermicomposting worm bin setup. Worms need adequate drainage, proper aeration, and protection from extreme temperatures. The bin should be opaque or dark-colored since worms prefer darkness and will avoid light.
Indoor Bin Options
For apartment dwellers or those with limited outdoor space, stacking tray systems work exceptionally well indoors. These bins feature multiple trays that allow you to harvest from the bottom while adding fresh bedding on top. A standard 15-gallon plastic storage bin with drilled holes serves beginners perfectly and costs under twenty dollars.
Outdoor Bin Options
Outdoor worm bins benefit from larger capacity systems. Wooden bins provide excellent insulation against temperature fluctuations and blend naturally into garden landscapes. Concrete blocks or bricks arranged in a rectangular pattern create a durable, long-lasting habitat for your worm colony. Ensure your outdoor bin has a secure lid to prevent predators like rats, birds, and raccoons from accessing the contents.
Essential Materials for Worm Bin Setup
Gathering quality materials before beginning your vermicomposting worm bin setup prevents frustration later. Each component serves a specific purpose in creating the ideal habitat for your red wigglers.
- Container: 10-20 gallon opaque plastic bin with matching lid
- Bedding: Shredded cardboard, newspaper, or coconut coir
- Worms: One pound of red wigglers per square foot of surface area
- Drainage tray: Collects excess moisture and worm tea
- Drill: 1/4-inch bits for drainage and aeration holes
- pH meter: Monitor acidity levels in your bin
- Spray bottle: Maintain proper moisture levels
- Food scraps: Fruit and vegetable waste, coffee grounds, tea bags
Step-by-Step Worm Bin Setup Process
Follow this systematic approach for successful vermicomposting worm bin setup. Taking time during preparation ensures your worms establish quickly and remain productive.
Step 1: Prepare Your Container
Drill drainage holes across the bottom of your bin using a 1/4-inch drill bit. Space holes approximately 2 inches apart to allow excess moisture to escape while preventing bedding from falling through. Drill additional ventilation holes around the upper sides of the container, about 3 inches from the top. Place your bin inside a solid drainage tray to collect the valuable liquid fertilizer called worm tea.
Step 2: Create the Bedding Layer
Fill your bin with 4-6 inches of moist bedding material. Shred cardboard or newspaper into 1-2 inch strips for optimal texture. The bedding should feel like a wrung-out sponge—damp but not dripping. Avoid glossy paper, colored inserts, or pages with heavy ink. Add a handful of garden soil or sand to provide grit for the worms' digestive systems.
Step 3: Introduce Your Worms
Purchase red wiggler worms from a reputable supplier or garden center. Red wigglers differ from nightcrawlers—they thrive in confined spaces and prefer decomposing material over soil. Place the worms gently on top of the bedding and let them burrow in naturally over the next day or two. They will find their preferred depth and begin establishing their new home.
Step 4: Begin Feeding Gradually
Wait 2-3 days after introducing your worms before offering the first meal. Start with small amounts of fruit and vegetable scraps buried gently beneath the bedding surface. Good beginner foods include melon rinds, banana peels, lettuce scraps, and coffee grounds. Avoid citrus, onions, garlic, spicy foods, meat, dairy, and oily substances initially.
Optimal Location and Environmental Conditions
Where you place your worm bin significantly impacts its success. Red wigglers thrive within a narrow temperature range and require protection from environmental extremes.
Temperature Requirements
Worms perform best between 55°F and 77°F (13°C-25°C). Below 50°F, their metabolism slows dramatically, and reproduction stops. Above 85°F, worms begin dying rapidly. Indoor locations like under kitchen sinks, in climate-controlled garages, or basement corners provide stable conditions. Outdoor bins need placement in shaded areas during summer and insulated locations during winter.
Light and Protection Considerations
Worms naturally avoid light, so keep your bin in a dimly lit area or ensure the lid remains closed during daylight hours. Position outdoor bins under covered porches, beneath dense shrubs, or in shaded garden corners. Protect against predators by securing lids with bungee cords or weights in windy locations.
Feeding and Maintaining Your Worm Bin
Consistent care determines whether your worm colony flourishes or fails. Understanding their dietary preferences and environmental needs transforms casual composting into thriving vermiculture.
What to Feed Your Worms
Red wigglers consume most kitchen scraps, converting waste into valuable castings. Excellent food sources include fruit and vegetable peels, coffee grounds and filters, tea bags (without staples), crushed eggshells, bread and grains, and garden trimmings. Chop larger scraps into smaller pieces to accelerate decomposition and make feeding easier for your worms.
What to Avoid Feeding
Certain materials harm worms or create problematic conditions in your bin. Never add citrus fruits, onions, garlic, or spicy vegetables in large quantities—these create acidic conditions. Avoid meat, fish, dairy products, oils, fats, and pet waste. These items attract pests, create odors, and can introduce pathogens harmful to your worms.
Moisture Management
Maintain bedding moisture at approximately 70-80 percent humidity. The material should clump when squeezed but not release dripping water. If the bin becomes too wet, add dry cardboard or newspaper strips. If too dry, mist lightly with water using your spray bottle. Proper moisture supports the aerobic bacteria worms need for food decomposition.
Feeding Schedule and Portions
Feed your worms 2-3 times weekly, providing only what they can consume within 24-48 hours. Overfeeding leads to rotting food, fruit flies, and anaerobic conditions. A good starting ratio is one-half pound of food scraps per pound of worms. Monitor consumption and adjust portions based on how quickly your worms process the offerings.
Troubleshooting Common Vermicomposting Problems
Even well-maintained worm bins occasionally develop issues. Recognizing problems early and implementing corrective measures keeps your colony healthy and productive.
Managing Unpleasant Odors
Foul smells indicate anaerobic conditions from overfeeding, excessive moisture, or inappropriate materials. Remedy odors by adding fresh dry bedding, reducing feeding amounts, and gently stirring the contents to increase aeration. If smell persists, remove any rotting food and check for decomposing animal products.
Controlling Fruit Flies
Fruit flies swarm around ripe fruit scraps and can infest worm bins. Prevent infestations by burying food deeply beneath bedding, freezing scraps before adding them, or covering fresh additions with a thin layer of damp newspaper. Yellow sticky traps catch adult flies effectively without harming your worms.
Addressing Worm Migration
If worms escape the bin or gather near the top, environmental conditions have become uncomfortable. Check for temperature extremes, excessive moisture, or ammonia buildup from too much nitrogen-rich material. Add carbon-rich brown materials like torn cardboard to balance the environment and restore comfort.
Harvesting and Using Your Vermicompost
After 2-4 months of active composting, your bin produces rich, dark vermicompost ready for application. Regular harvesting maintains bin productivity and provides consistent fertilizer for your plants.
Harvesting Methods for Beginners
The light exposure method works well for most worm bin setups. Move the contents to one side of the bin and add fresh bedding and food to the empty section. Over the next few weeks, worms migrate toward the new food source, leaving finished compost in the vacated area. Simply scoop out the processed material and use it immediately or store it in breathable bags.
Using Vermicompost in Your Garden
Vermicompost contains up to five times more available nitrogen, seven times more phosphorus, and eleven times more potassium than traditional garden soil. Mix 1-2 inches of vermicompost into planting holes for vegetables and annuals. For established plants, top-dress with a half-inch layer around the root zone. Brew vermicompost tea by steeping one cup of castings in five gallons of water for 24-48 hours for an excellent liquid fertilizer.
Benefits of Vermicomposting in 2026
Starting your vermicomposting journey today connects you with a growing movement of sustainable gardeners. Beyond producing exceptional fertilizer, worm composting reduces household waste, decreases landfill contributions, and provides educational opportunities for children and adults alike. The process costs less than traditional fertilizers, requires minimal ongoing investment, and delivers measurable results in plant health and garden productivity.
FAQ: Vermicomposting Worm Bin Setup Questions
How much does it cost to start a worm bin?
A basic worm bin setup costs between $30-$60 for the container, bedding materials, and initial worm purchase. DIY options using recycled plastic bins reduce costs further to under $40 total. The ongoing expense is minimal—worms reproduce naturally and require no special food purchases.
How long before I get usable compost?
Expect to harvest your first batch of vermicompost after 2-4 months depending on feeding frequency, temperature, and worm population size. The process accelerates during warmer months when worms are most active. Regular harvesting every 3-4 months keeps your bin productive.
Can I vermicompost outdoors in cold climates?
Yes, but outdoor bins require insulation during freezing temperatures. Options include burying bins in garden soil, wrapping containers with bubble wrap or foam, or moving the bin to insulated structures like garages or sheds during winter months. Worms become dormant below 50°F but survive if protected from hard freezes.
What's the difference between vermicomposting and regular composting?
Traditional composting relies on microorganisms and environmental conditions to break down materials through thermophilic (high-heat) or mesophilic (moderate-heat) processes. Vermicomposting uses earthworms alongside bacteria, creating compost at ambient temperatures without flipping or turning. Vermicompost typically contains more beneficial microorganisms and growth hormones than conventionally composted material.
How do I know if my worms are healthy?
Healthy red wigglers appear pinkish-red with segmented bodies and active movement when disturbed. They cluster together and burrow away from light. Unhealthy signs include pale or yellowish coloring, sluggish movement, bad odors, or worms attempting to escape. Address environmental issues immediately if you notice these warning signs.
Can I use earthworms from my yard instead of buying red wigglers?
No, native earthworms found in garden soil are not suitable for vermicomposting. They live deep in soil and won't thrive in confined bin environments with surface food scraps. Red wigglers (Eisenia fetida) specifically evolved for decomposing surface organic matter and tolerate the conditions created in worm bins.
No comments