Dill Growing in Containers: 2026 Complete Step-by-Step Guide
Dill Growing in Containers: 2026 Complete Step-by-Step Guide
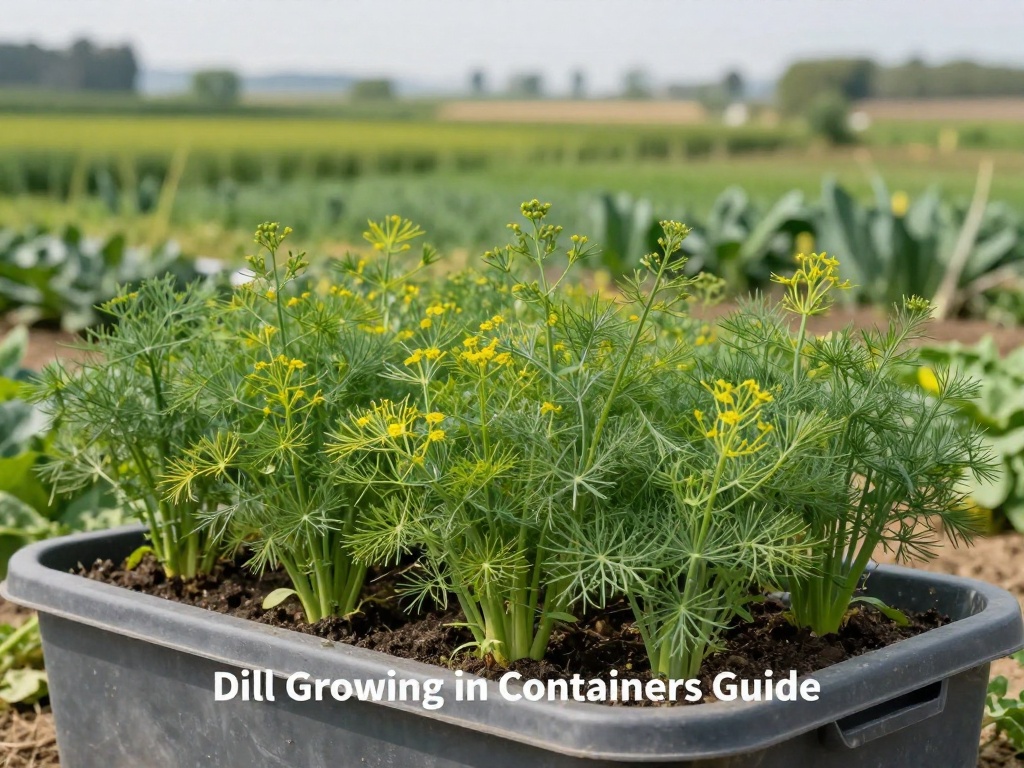
Growing dill in containers offers a convenient way to enjoy fresh, aromatic herbs right from your balcony or kitchen windowsill. This comprehensive dill growing in containers guide provides everything you need for a thriving herb garden, regardless of your available outdoor space. Container gardening makes it possible for apartment dwellers and urban gardeners to cultivate this versatile culinary herb successfully.
Why Choose Container Gardening for Dill
Container gardening transforms your dill-growing possibilities. This dill growing in containers guide highlights why containers work exceptionally well for this herb. Dill develops a long taproot that actually benefits from the controlled environment of a container, allowing you to manage soil quality and drainage precisely. Growing dill in pots also grants you mobility—you can move plants to follow sunlight patterns or bring them indoors during unfavorable weather.
Benefits of Container-Grown Dill
- Space flexibility: Grow dill on patios, balconies, windowsills, or rooftops
- Better pest control: Elevated containers reduce ground-dwelling pest access
- Controlled environment: Manage soil conditions, drainage, and nutrients precisely
- Extended growing season: Move containers indoors during cold snaps
- Aesthetic appeal: Add greenery and fragrance to outdoor living spaces
Selecting the Right Container for Dill
Choosing appropriate containers proves essential for successful dill cultivation. This section of our dill growing in containers guide covers container selection criteria that promote healthy root development and vigorous growth.
Container Size Requirements
Dill plants require adequate depth for their taproot systems. Select containers at least 12 inches deep to accommodate root growth. For maximum yield and healthiest plants, use containers measuring 18-24 inches in depth. Width matters too—plan for 6-8 inches of spacing between mature plants to prevent overcrowding and competition for nutrients.
Best Container Materials
- Terra cotta pots: Excellent breathability and natural moisture regulation
- Plastic containers: Lightweight, affordable, and retain moisture well
- Fabric grow bags: Provide superior drainage and prevent root circling
- Wooden barrels: Attractive appearance and good insulation properties
Ensure any container you select includes adequate drainage holes—dill suffers quickly from waterlogged soil conditions. Place a drip tray beneath containers to protect surfaces while allowing excess water to escape.
Soil Preparation and Growing Medium
Creating the ideal growing medium forms the foundation of successful container dill cultivation. This dill growing in containers guide emphasizes proper soil preparation as a critical success factor.
Optimal Soil Mix for Container Dill
Dill thrives in well-draining, moderately rich soil with a pH range between 5.5 and 6.5. Combine high-quality potting mix with perlite or coarse sand in a 3:1 ratio to achieve excellent drainage while retaining necessary moisture. Add a handful of aged compost to boost nutrients without creating overly saturated conditions.
DIY Container Soil Recipe
- 2 parts quality commercial potting soil
- 1 part perlite or coarse sand
- 1/2 part aged compost
- 1 tablespoon bone meal (optional, for phosphorus support)
Commercial potting mixes designed specifically for herbs or vegetables also work excellently and eliminate guesswork for beginners.
Step-by-Step Planting Process
Proper planting techniques set the stage for vigorous dill growth throughout the season. Follow these steps from our dill growing in containers guide for optimal results.
When to Plant Dill in Containers
Timing your planting correctly significantly impacts success rates. Sow dill seeds outdoors after all frost danger passes, typically 2-3 weeks before your last expected frost date. In containers, you can start seeds indoors 4-6 weeks earlier since you control the environment more easily. Dill germination requires soil temperatures between 60-70°F (15-21°C) for best results.
Planting Steps for Maximum Yield
- Prepare containers: Clean old containers with a 10% bleach solution, add drainage materials, and fill with prepared soil mix
- Moisten soil thoroughly: Water the soil 24 hours before planting to achieve even moisture without saturation
- Sow seeds: Scatter dill seeds thinly across the soil surface, approximately 1/4 inch deep
- Cover lightly: Apply a thin layer of soil or vermiculite over seeds
- Maintain moisture: Mist the surface gently and cover with plastic wrap until germination occurs
- Thin seedlings: Remove weaker seedlings once they reach 2-3 inches tall, leaving 6-8 inches between plants
Essential Care Requirements
Maintaining healthy container dill requires attention to several key factors. This section of our dill growing in containers guide covers the ongoing care essential for thriving plants.
Watering Guidelines
Container dill requires consistent moisture levels—neither waterlogged nor completely dry. Water deeply when the top inch of soil feels dry to the touch, typically every 2-3 days depending on temperature and humidity. During hot summer months, daily watering may be necessary. Water at the soil level to avoid wetting foliage, which can encourage fungal diseases.
Sunlight Needs
Dill demands full sun exposure for robust growth and maximum essential oil production, which creates its characteristic flavor and aroma. Position containers to receive at least 6-8 hours of direct sunlight daily. South-facing locations typically provide ideal sun exposure in the Northern Hemisphere. Supplement with grow lights if natural light proves insufficient for indoor growing.
Fertilization Schedule
Container dill benefits from regular feeding to compensate for limited soil volume. Apply a balanced liquid fertilizer (10-10-10) diluted to half strength every 4-6 weeks during the growing season. Avoid over-fertilizing, which produces lush foliage but diminishes flavor concentration. Organic options like fish emulsion or seaweed extract provide excellent nutrition without chemical concerns.
Managing Common Challenges
Even well-maintained container dill faces occasional problems. This dill growing in containers guide addresses common issues and their solutions.
Pest Prevention and Treatment
Container-grown dill attracts fewer pests than garden-grown plants, but several may still appear. Aphids cluster on tender new growth—spray them off with a strong water jet or apply insecticidal soap. Spider mites prefer dry conditions—increase humidity around containers and spray plants regularly. Parsley worms (caterpillars) can be hand-picked and relocated since they transform into beneficial swallowtail butterflies.
Disease Management
Proper cultural practices prevent most dill diseases. Avoid overhead watering to reduce powdery mildew risk. Ensure adequate spacing between plants for air circulation. If fungal issues appear, remove affected foliage immediately and apply a organic fungicide containing neem oil or copper. Root rot occurs from overwatering—ensure excellent drainage and water only when soil demands it.
Harvesting and Using Your Container Dill
Knowing when and how to harvest maximizes your container dill production while encouraging continued growth.
Harvesting Techniques
Begin harvesting dill when plants reach 6-8 inches tall, typically 6-8 weeks after planting. Snip outer leaves first, leaving the central growth point intact for continued production. For the most intense flavor, harvest in the morning after dew dries but before afternoon heat concentrates essential oils. Regular harvesting encourages bushier growth and extends the production window.
Storage and Culinary Uses
- Fresh storage: Wrap cut stems in damp paper towels and refrigerate for up to one week
- Freezing: Chop dill and freeze in ice cube trays with water or olive oil
- Drying: Hang bundled stems upside-down in a warm, dry location
- Culinary applications: Use fresh in salads, fish dishes, pickles, sauces, and soups
Extending Your Growing Season
Maximize your dill harvest with season extension techniques. Container gardening provides flexibility that in-ground gardening cannot match.
Overwintering Strategies
Dill is technically a tender perennial but often grown as an annual. In containers, you can extend its life by moving plants indoors before frost. Place container dill near a sunny south-facing window or under grow lights. Reduce watering and stop fertilizing during winter dormancy. Most dill plants will survive one winter with proper care, though flavor quality may decline in subsequent seasons.
Succession Planting for Continuous Harvest
Stagger your plantings every 3-4 weeks from early spring through midsummer to ensure continuous fresh dill availability. Sow a small container of new seeds every month during peak growing season. This approach guarantees you always have young, tender foliage ready for harvest while mature plants continue producing.
Best Dill Varieties for Container Growing
Selecting appropriate varieties enhances container gardening success. Some dill cultivars perform better in confined spaces than others.
Recommended Cultivars
- Dukat: Exceptional flavor, compact growth habit, excellent for containers
- Bouquet: Classic variety, early maturing, ideal for both leaves and seeds
- Fernleaf: Dwarf variety specifically bred for containers, reaches only 18 inches
- Mammoth: Taller variety best for seed production, requires larger containers
- Superdukat: Enhanced essential oil content, superior flavor concentration
FAQ: Common Questions About Growing Dill in Containers
Can dill grow indoors in containers year-round?
Yes, dill thrives indoors in containers when provided with adequate sunlight. Place containers near the brightest south-facing windows available, or supplement with full-spectrum grow lights running 12-14 hours daily. Indoor dill may grow more slowly during winter months due to reduced natural light, but it remains productive with proper care.
How often should I water container-grown dill?
Water container dill when the top inch of soil feels dry, typically every 2-3 days during warm weather. During hot summer conditions, daily watering may be necessary. Always check soil moisture before watering—dill prefers consistent moisture but suffers quickly from waterlogged conditions that cause root rot.
Why is my container dill turning yellow?
Yellowing dill foliage typically indicates overwatering, nutrient deficiency, or insufficient sunlight. Examine your watering schedule first—allow soil to dry slightly between waterings. If yellowing continues, apply a balanced liquid fertilizer. Ensure your container receives at least 6 hours of direct sunlight daily, as inadequate light causes similar symptoms.
How long does it take for dill to grow in containers?
Dill reaches harvestable size in approximately 40-60 days from seeding. Leaves become ready for first harvest when plants reach 6-8 inches tall. Full maturity for seed production requires 70-90 days. Container dill grows slightly slower than garden-planted dill due to limited root space, but produces reliably with proper care.
Do I need to thin dill seedlings in containers?
Yes, thinning proves essential for healthy container dill development. When seedlings reach 2-3 inches tall, thin them to 6-8 inches apart to prevent overcrowding. Crowded dill competes for nutrients and light, resulting in weak, leggy plants with poor flavor. Thinned seedlings can be transplanted to other containers or used as microgreens.
What size container is best for growing dill?
The ideal container for dill is at least 12 inches deep and 12 inches wide, with 18-24 inches depth preferred for optimal taproot development. Each dill plant needs approximately 6-8 inches of spacing. A 5-gallon container accommodates one mature dill plant comfortably, while a 15-gallon window box can support 3-4 plants.
Can I grow dill and other herbs together in the same container?
Dill can share containers with compatible herbs sharing similar growing requirements. Best companions include cilantro, parsley, and chives, which all prefer full sun and moderate moisture. Avoid planting dill with fennel, as they compete negatively. Remember that shared containers require more frequent watering and fertilizing than single-plant setups.
How much does it cost to start a container dill garden?
Starting a container dill garden costs approximately $20-50 depending on your choices. Basic expenses include a quality container ($8-20), potting soil and amendments ($10-15), and dill seeds ($3-8). Reusable containers and saving seeds from previous harvests reduce ongoing costs significantly. Most gardeners recoup their investment through a single summer of fresh herb harvests.
No comments